このチュートリアルでは、その方法を学びます アクティブにする TLSNGINXのv1.3。 どういう意味ですか TLSv 1.3, それは何に役立ちますか なぜ あなたが必要です Webサーバー上で TLS 活性化できる。 管理システムを備えたサーバーの場合 VestaCP (CentOS または Ubuntu) は少し難しいです 有効にするために TLS 1.3 cPanel サーバーよりも簡単ですが、不可能ではありません。
キュプリン
なぜそれが良いのですか TLS 1.3より TLS 1.2?
TLS (Transport Layer Security) あります 暗号化プロトコル それは保証します 接続セキュリティ コンピュータとそれが属するネットワークとの間。 TLS 次のようなアプリケーションで使用されます。 email, メッセージング, 音声通話とビデオ通話 (VoIP)、しかし特に HTTPS。 ユーザーのパソコンやスマートフォンと、アクセスしたページのWebサーバーとの間の安全な通信を確保します。
TLS 1.3 を提供します より高速な 接続クライアント – サーバーと また、セキュリティ いくつかのアルゴリズムを排除することによって。 間の違い TLSv1.2 および TLSv1.3.
約 HTTPS, SSL (Secure Sockets Layer)他の記事でも言いました:
- 証明書のインストール方法 SSL (HTTPS 接続)cPanelまたはcPanelなしでNGINXサーバーでホストされているWebサイトの場合 VestaCP
- 再コンパイルする OpenSSL 1.1 および NGINX 1.25 用 TLS 1.3(CentOS 7)
- ブログやウェブサイトを移動する方法 WordPress HTTPから HTTPS (NGINX)
- 古いドメインを削除する Certbot certificates (証明書を暗号化しましょう)
NGINXでTLS 1.3を有効化する方法は?VestaCP管理のサーバー / CentOS
アクティベーション方法を確認する前に TLSNGINX の v1.3 では、いくつかの最小要件を考慮する必要があります。 TLS 1.3.
- NGINX 1.13.x以降
- 証明書 TLS 有効な
- DNS が適切に構成されたアクティブなドメイン名 - インターネット上でアクセス可能
- 証明書 TLS / SSL 有効。 それも可能です Let’s Encrypt.
Pe VestaCP かなり前にインストールされているため、利用可能なプロトコルしかありません TLS 1.2。 多くのチュートリアルで、次のようにすれば十分であることがわかりました。 nginx.conf ca に次の行を追加しましょう TLS 1.3 をアクティブ化するには:
server {

  listen 443 ssl http2;
  listen [::]:443 ssl http2;

  server_name example.com;
  root /var/www/example.com/public;

  ssl_certificate /path/to/your/certificate.crt;
  ssl_certificate_key /path/to/your/private.key;

  ssl_protocols TLSv1.2 TLSv1.3;
偽。 もしも サーバー CentOS 経営陣と VestaCP, NGINXはコンパイルされていません 最小バージョンで OpenSSL 1.1.1.1, ssl_protocols TLSv1.2 TLSv1.3; における nginx.conf ..まったく役に立ちません。
[root@north ~]# nginx -V
nginx version: nginx/1.22.0
built by gcc 4.8.5 20150623 (Red Hat 4.8.5-44) (GCC)
built with OpenSSL 1.0.2k-fips  26 Jan 2017
TLS SNI support enabled
したがって、上記の例では、Nginx 1.22.0 が互換性のあるバージョンです。 TLS 1.3 ですが、ライブラリは役に立ちません OpenSSL 1.0.2k-fips.
有効にするために TLSNginx 上の v1.3 では、最初に子ライブラリと開発パッケージをインストールする必要があります。 Development Tools。 それは実行されます CentOS 7 つのコマンドライン:
yum install gcc gcc-c++ pcre-devel zlib-devel make unzip gd-devel perl-ExtUtils-Embed libxslt-devel openssl-devel perl-Test-Simple
yum groupinstall 'Development Tools'
1.最新バージョンをインストールする OpenSSL
現時点での最新バージョンは、 OpenSSL 1.1.1p、しかし、私が気づいた限りでは、すでに存在しており、 OpenSSL 3. ソースは次の場所にあります。 OpenSSL.ORG.
cd /usr/src
wget https://www.openssl.org/source/openssl-1.1.1p.tar.gz
tar xvf openssl-1.1.1p.tar.gz
mv openssl-1.1.1p openssl
cd openssl
./config --prefix=/usr/local/openssl --openssldir=/usr/local/openssl --libdir=/lib64 shared zlib-dynamic
make -j4
make test
make install
走るのにとても大切なこと make test ライブラリをインストールする前に。 テストにエラーがある場合は実行しないでください make install エラーが修正されるまで。
次のステップでは、現在のバイナリ ファイルのバックアップを作成します。 openssl そして追加します symlink 新しいものへ。
mv /usr/bin/openssl /usr/bin/openssl-backup
ln -s /usr/local/openssl/bin/openssl /usr/bin/openssl
イン /usr/local/openssl/bin 実行する ldd 依存関係を確認するには openssl。 のバージョンも確認できるかもしれません openssl。 指示 openssl version.
[root@north bin]# ldd openssl
	linux-vdso.so.1 =>  (0x00007ffd20bd7000)
	libssl.so.1.1 => /lib64/libssl.so.1.1 (0x00007fab09b62000)
	libcrypto.so.1.1 => /lib64/libcrypto.so.1.1 (0x00007fab09675000)
	libdl.so.2 => /lib64/libdl.so.2 (0x00007fab09471000)
	libpthread.so.0 => /lib64/libpthread.so.0 (0x00007fab09255000)
	libc.so.6 => /lib64/libc.so.6 (0x00007fab08e87000)
	/lib64/ld-linux-x86-64.so.2 (0x00007fab09df5000)
[root@north bin]# openssl version
OpenSSL 1.1.1p  21 Jun 2022
現在、最新バージョンがインストールされています OpenSSL 耐えるもの TLSv1.3。 バージョンを確認できます TLS / SSL 書店様にご協力いただきました OpenSSL 命令により:
[root@north bin]# openssl ciphers -v | awk '{print $2}' | sort | uniq
SSLv3
TLSv1
TLSv1.2
TLSv1.3
[root@north bin]#
これは、Web サイトが管理者の支援を受けてホストされているという意味ではありません。 VestaCP 彼らはすぐに持っているでしょう TLS 1.3.
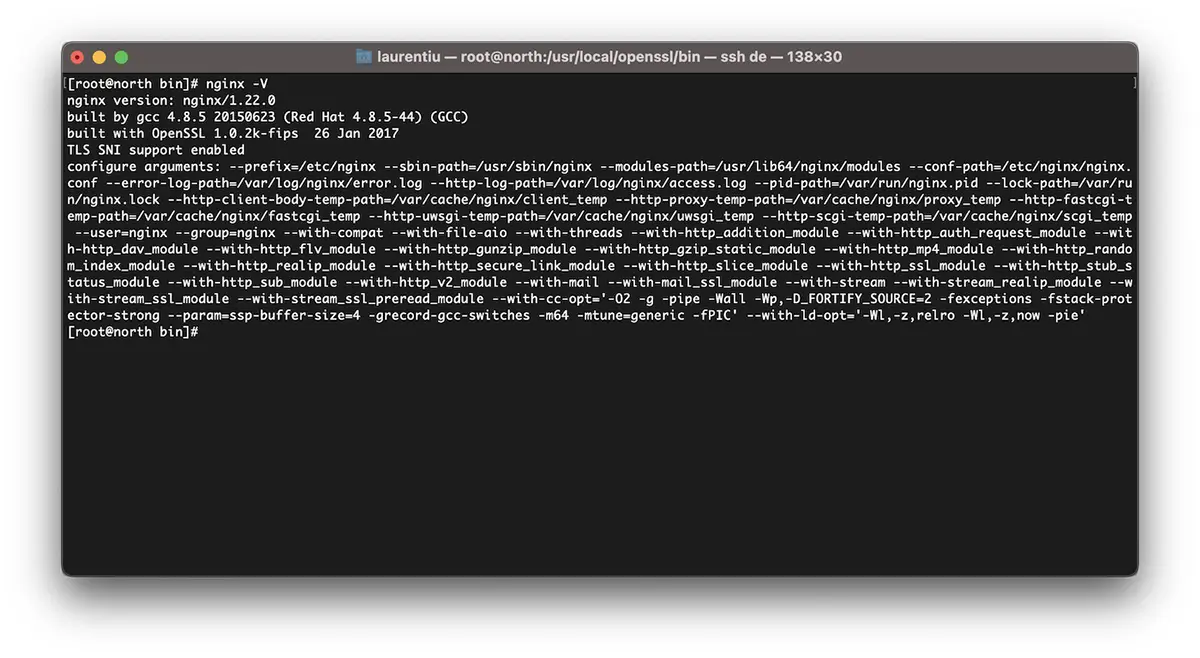
設置しておりますが、 OpenSSL 1.1.1p, Nginxは古いバージョンでコンパイルされています OpenSSL 1.0.2k-fips.
[root@north bin]# nginx -V
nginx version: nginx/1.22.0
built by gcc 4.8.5 20150623 (Red Hat 4.8.5-44) (GCC)
built with OpenSSL 1.0.2k-fips  26 Jan 2017
TLS SNI support enabled
configure arguments: --prefix=/etc/nginx --sbin-path=/usr/sbin/nginx --modules-path=/usr/lib64/nginx/modules --conf-path=/etc/nginx/nginx.conf --error-log-path=/var/log/nginx/error.log --http-log-path=/var/log/nginx/access.log --pid-path=/var/run/nginx.pid --lock-path=/var/run/nginx.lock --http-client-body-temp-path=/var/cache/nginx/client_temp --http-proxy-temp-path=/var/cache/nginx/proxy_temp --http-fastcgi-temp-path=/var/cache/nginx/fastcgi_temp --http-uwsgi-temp-path=/var/cache/nginx/uwsgi_temp --http-scgi-temp-path=/var/cache/nginx/scgi_temp --user=nginx --group=nginx --with-compat --with-file-aio --with-threads --with-http_addition_module --with-http_auth_request_module --with-http_dav_module --with-http_flv_module --with-http_gunzip_module --with-http_gzip_static_module --with-http_mp4_module --with-http_random_index_module --with-http_realip_module --with-http_secure_link_module --with-http_slice_module --with-http_ssl_module --with-http_stub_status_module --with-http_sub_module --with-http_v2_module --with-mail --with-mail_ssl_module --with-stream --with-stream_realip_module --with-stream_ssl_module --with-stream_ssl_preread_module --with-cc-opt='-O2 -g -pipe -Wall -Wp,-D_FORTIFY_SOURCE=2 -fexceptions -fstack-protector-strong --param=ssp-buffer-size=4 -grecord-gcc-switches -m64 -mtune=generic -fPIC' --with-ld-opt='-Wl,-z,relro -Wl,-z,now -pie'
[root@north bin]# openssl version
OpenSSL 1.1.1p  21 Jun 2022
[root@north bin]#
2. システム用に Nginx を再コンパイルします。 VestaCP
このステップでは、再コンパイルする必要があります。 OpenSSL すでにインストールされている Nginx のバージョン システム上で CentOS / VestaCP。 上でも言いましたが、私の場合は nginx/1.22.0。 ここでは、次のような Web サーバーについて話しているので、 VestaCP 管理システムを再コンパイルする前に、nginx 構成ファイルのバックアップを作成することをお勧めします。
システム上の現在の Nginx をバックアップします VestaCP
ディレクトリをアーカイブしてサーバー上のどこかに保存します。」/etc/nginx「と」/usr/local/vesta/nginx"
走る nginx -V 既存のモジュールをファイルに保存します。
configure arguments: --prefix=/etc/nginx --sbin-path=/usr/sbin/nginx --modules-path=/usr/lib64/nginx/modules --conf-path=/etc/nginx/nginx.conf --error-log-path=/var/log/nginx/error.log --http-log-path=/var/log/nginx/access.log --pid-path=/var/run/nginx.pid --lock-path=/var/run/nginx.lock --http-client-body-temp-path=/var/cache/nginx/client_temp --http-proxy-temp-path=/var/cache/nginx/proxy_temp --http-fastcgi-temp-path=/var/cache/nginx/fastcgi_temp --http-uwsgi-temp-path=/var/cache/nginx/uwsgi_temp --http-scgi-temp-path=/var/cache/nginx/scgi_temp --user=nginx --group=nginx --with-compat --with-file-aio --with-threads --with-http_addition_module --with-http_auth_request_module --with-http_dav_module --with-http_flv_module --with-http_gunzip_module --with-http_gzip_static_module --with-http_mp4_module --with-http_random_index_module --with-http_realip_module --with-http_secure_link_module --with-http_slice_module --with-http_ssl_module --with-http_stub_status_module --with-http_sub_module --with-http_v2_module --with-mail --with-mail_ssl_module --with-stream --with-stream_realip_module --with-stream_ssl_module --with-stream_ssl_preread_module --with-cc-opt='-O2 -g -pipe -Wall -Wp,-D_FORTIFY_SOURCE=2 -fexceptions -fstack-protector-strong --param=ssp-buffer-size=4 -grecord-gcc-switches -m64 -mtune=generic -fPIC' --with-ld-opt='-Wl,-z,relro -Wl,-z,now -pie'
アップグレードのために Nginx を再コンパイルする方法 OpenSSL / CentOS 7
繰り返します。 あなたが持っている場合 VestaCP, すでにインストールされているバージョンの Nginx をダウンロードします。 Nginx バージョンのすべてのアーカイブは次の場所にあります。 nginx.org.
cd /usr/src
wget https://nginx.org/download/nginx-1.22.0.tar.gz
tar xvf nginx-1.22.0.tar.gz
cd nginx-1.22.0
nginx モジュールを再コンパイルします。
./configure --prefix=/etc/nginx \
--sbin-path=/usr/sbin/nginx \
--modules-path=/usr/lib64/nginx/modules \
--conf-path=/etc/nginx/nginx.conf \
--error-log-path=/var/log/nginx/error.log  \
--http-log-path=/var/log/nginx/access.log  \
--pid-path=/var/run/nginx.pid  \
--lock-path=/var/run/nginx.lock  \
--http-client-body-temp-path=/var/cache/nginx/client_temp  \
--http-proxy-temp-path=/var/cache/nginx/proxy_temp  \
--http-fastcgi-temp-path=/var/cache/nginx/fastcgi_temp  \
--http-uwsgi-temp-path=/var/cache/nginx/uwsgi_temp  \
--http-scgi-temp-path=/var/cache/nginx/scgi_temp  \
--user=nginx  \
--group=nginx  \
--with-compat  \
--with-file-aio  \
--with-threads  \
--with-http_addition_module  \
--with-http_auth_request_module  \
--with-http_dav_module  \
--with-http_flv_module  \
--with-http_gunzip_module  \
--with-http_gzip_static_module  \
--with-http_mp4_module  \
--with-http_random_index_module  \
--with-http_realip_module  \
--with-http_secure_link_module  \
--with-http_slice_module  \
--with-http_ssl_module  \
--with-http_stub_status_module  \
--with-http_sub_module  \
--with-http_v2_module  \
--with-mail  \
--with-mail_ssl_module  \
--with-stream  \
--with-stream_realip_module  \
--with-stream_ssl_module  \
--with-stream_ssl_preread_module  \
--with-openssl=/usr/src/openssl  \
--with-cc-opt='-O2 -g -pipe -Wall -Wp,-D_FORTIFY_SOURCE=2 -fexceptions -fstack-protector-strong  \
--param=ssp-buffer-size=4 -grecord-gcc-switches -m64 -mtune=generic -fPIC'  \
--with-ld-opt='-Wl,-z,relro -Wl,-z,now -pie'
make -j4
make installこれで、Nginx がインストールされ、最新バージョンでコンパイルされました。 OpenSSL 耐えられる TLSv1.3。
[root@north bin]# nginx -V
nginx version: nginx/1.22.0
built by gcc 4.8.5 20150623 (Red Hat 4.8.5-44) (GCC)
built with OpenSSL 1.1.1p  21 Jun 2022
TLS SNI support enabled
※nginxが既にサーバーにインストールされている場合は、アンインストールする必要があります。 nginx のアップグレードでコンパイルが機能しない。
VestaCP上のドメインでTLSv1.3を有効化する方法は?
ファイル内 /etc/nginx/nginx.conf 次の行を追加します。
ssl_protocols TLSv1.2 TLSv1.3;
ssl_prefer_server_ciphers on;
ssl_ciphers 'ECDHE-ECDSA-AES256-GCM-SHA384:ECDHE-RSA-AES256-GCM-SHA384:ECDHE-ECDSA-CHACHA20-POLY1305:ECDHE-RSA-CHACHA20-POLY1305:ECDHE-ECDSA-AES128-GCM-SHA256:ECDHE-RSA-AES128-GCM-SHA256:ECDHE-ECDSA-AES256-SHA384:ECDHE-RSA-AES256-SHA384:ECDHE-ECDSA-AES128-SHA256:ECDHE-RSA-AES128-SHA256';
ドメインレベルで、テンプレート内の何かを変更しました VestaCP そしてHTTP/2を有効にします。 したがって、Let's Encrypt を有効にして新しいドメイン (example.com) を追加する場合、次のような設定ファイルがあります。 SSL:
cat /home/vestacpuser/conf/web/example.com.nginx.ssl.conf

server {
    listen      IP.IP.IP.IP:443 ssl http2;
    server_name example.com www.example.com;
    root        /home/vestacpuser/web/example.com/public_html;
    index       index.php index.html index.htm;
    access_log  /var/log/nginx/domains/example.com.log combined;
    access_log  /var/log/nginx/domains/example.com.bytes bytes;
    error_log   /var/log/nginx/domains/example.com.error.log error;

    ssl_certificate      /home/vestacpuser/conf/web/ssl.example.com.pem;
    ssl_certificate_key  /home/vestacpuser/conf/web/ssl.example.com.key;

....

ssl_protocols TLSv1.2 TLSv1.3;
ssl_prefer_server_ciphers on;
ssl_ciphers 'ECDHE-ECDSA-AES256-GCM-SHA384:ECDHE-RSA-AES256-GCM-SHA384:ECDHE-ECDSA-CHACHA20-POLY1305:ECDHE-RSA-CHACHA20-POLY1305:ECDHE-ECDSA-AES128-GCM-SHA256:ECDHE-RSA-AES128-GCM-SHA256:ECDHE-ECDSA-AES256-SHA384:ECDHE-RSA-AES256-SHA384:ECDHE-ECDSA-AES128-SHA256:ECDHE-RSA-AES128-SHA256';
nginx を再起動する前に、まずその構成をテストすることをお勧めします。
[root@north web]# nginx -t
nginx: the configuration file /etc/nginx/nginx.conf syntax is ok
nginx: configuration file /etc/nginx/nginx.conf test is successful
[root@north web]# systemctl restart nginx
このチュートリアルがお役に立てば幸いです。何か問題が発生した場合は、問題の詳細をコメントに残してください。